
Ruth moved into her new home as a first time buyer a little under a year ago. And as many of you will no doubt realise this is a big deal in today’s housing market where young people are increasingly being priced out of the market altogether.
However, being able to get on the ladder is just the first step and doesn’t necessarily mean that you can afford a place you are totally happy with. In most cases, you have to make a lot of compromises. Under normal circumstances, Ruth’s flat would be a perfect starter home for young professionals. It’s a relatively new build (only about 8 years old) and was a decorated neutrally throughout in magnolia, so it was a pretty blank canvas that many people would be happy with.
But being the design conscious homeowner that Ruth is she immediately wanted to make changes to bring the place up to her exacting standards and make it her own. Out with the magnolia for starters!! And once all the decorating was done Ruth decided to embark on some more adventurous projects.
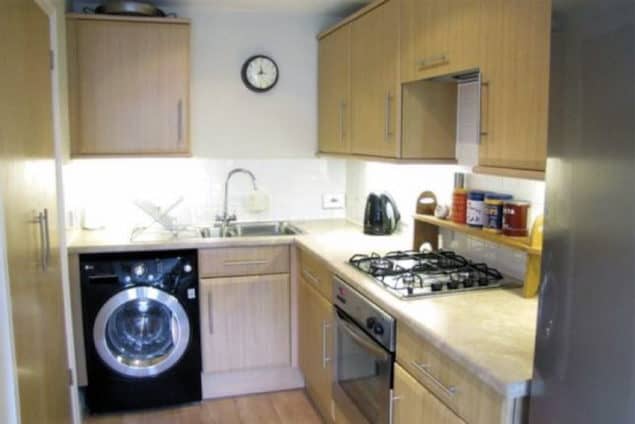
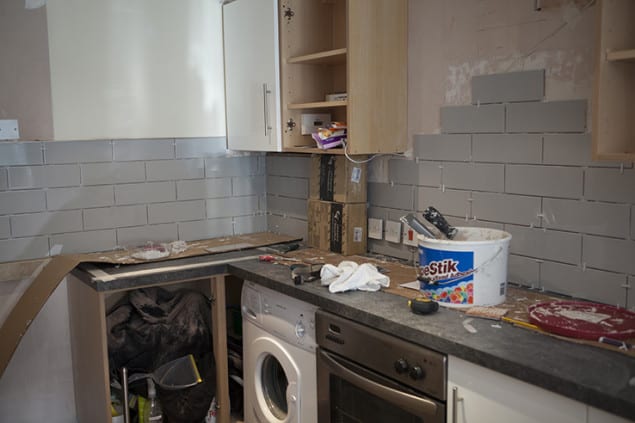
New flooring was laid throughout and extra storage was built in to the second bedroom to make use of an awkward space (we may do a post on this later!). But Ruth being Ruth, (she’s very spontaneous, loves a challenge and won’t take no for an answer) wasn’t satisfied and turned her attention to the kitchen which you can see above.
It’s a very small and compact kitchen that adjoins to the livingroom as part of an open plan space. Whilst it is functional, in great condition and perfectly workable, it just wasn’t what Ruth wanted.
For starters, every developer in the country seems to choose that same old beech kitchen with those handles. (I have an almost identical kitchen in my flat, which I am currently planning to makeover myself.)
Being design conscious means that you don’t relish having the same cookie cutter kitchen as everyone else. So Ruth redesigned the layout, moved the appliances and cabinets around, changed the doors, built a little extension, installed new work surfaces, changed out a few appliances as well as the sink and tap and re-tiled the walls.
Phew, she doesn’t do things by halves!! Luckily her parents are pretty handy on the DIY front so she roped them in to help. I’ll be doing a full post on the transformation as soon as the kitchen is complete but there have been a few delays which mean we have not been able to photograph it yet. However, we decided to do a stand-alone post on the process of re-tiling the kitchen.
Changing the tiles can really give a space a new lease of life and needn’t cost the earth. It’s also something that can be attempted by a novice DIY’er like Ruth. As it’s the first time Ruth had attempted anything like this and we figured that there will inevitably be people out there in the same situation looking to put their own unique stamp on their cookie cutter kitchen, we decided it warranted its own post.
We were lucky enough to team up with Tile Mountain who not only provided Ruth with all the equipment that she needed but they were also on hand to offer expert guidance and advice that we will be sharing with you today so that you might pluck up the courage to get your hands dirty and take on a similar tiling project.
The images below show the process that Ruth and her parents followed from start to finish, along with all the equipment she used to achieve the finished look. The comments that accompany the images are from Tile Mountain’s own technical expert Phil, who kindly prepared step by step instructions for Ruth to follow so she knew exactly what to do.
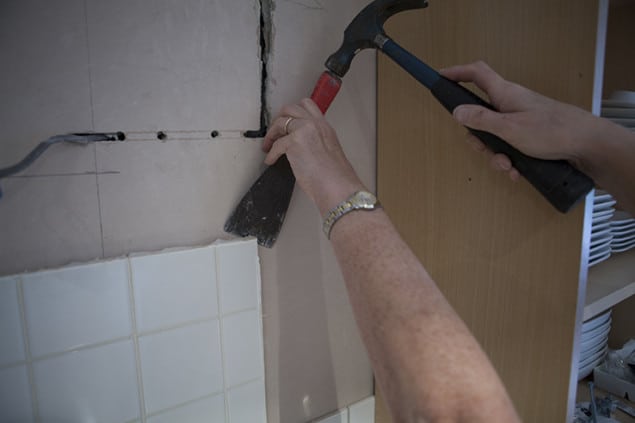
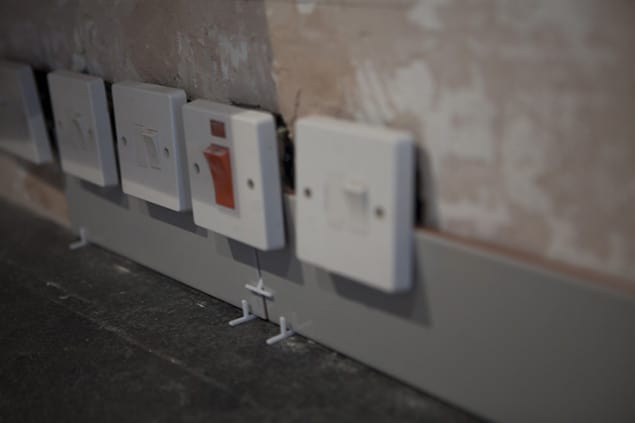
Wall preparation
Make sure the wall is suitably prepared for tiling (i.e. clean, dry, and free from dust and dirt), tiles can be fixed to most substrates including Plasterboard, skimmed plaster, tile backer boards etc.
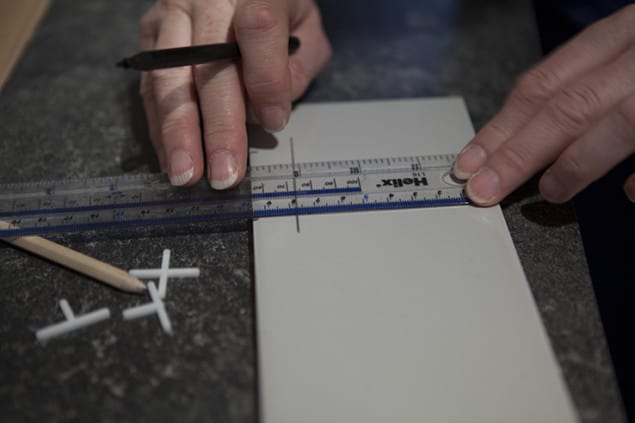
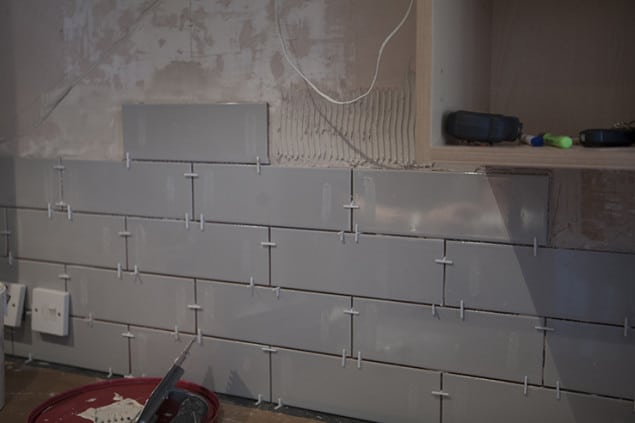
Setting out
Find the centre of the wall and mark a vertical and horizontal line using a spirit level. Dry lay your tiles starting at the centre, working your way out towards the end of the wall. You will need the tiles at either end to be approximately the same size, do this by adjusting your vertical reference line.
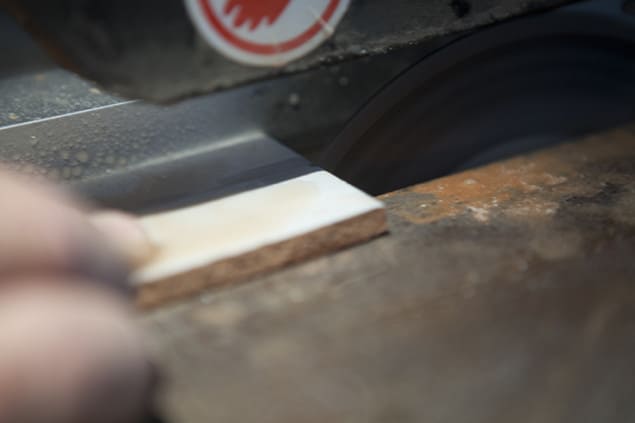
Cutting
Ceramic tiles can easily be cut in a straight line using a score and snap tile cutter.
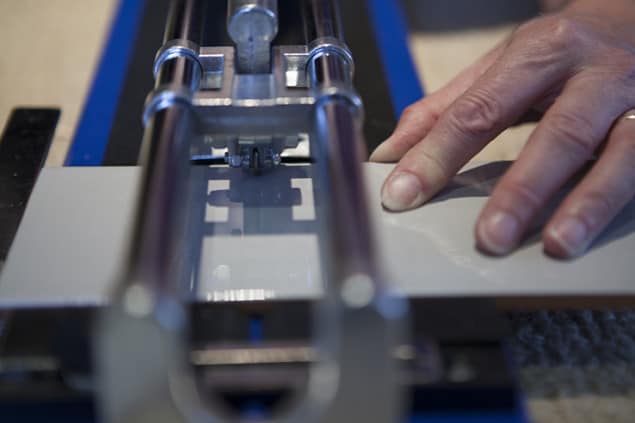

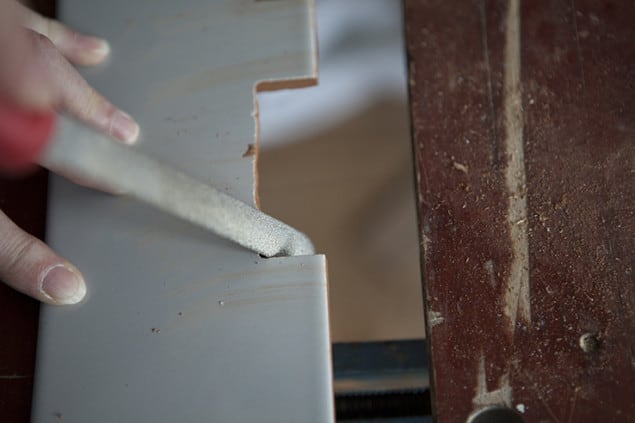
For irregular cuts, such as around plug sockets, an electric diamond wheel tile cutter is beneficial.
However, the same type of cut can be achieved using a straight cutter for scoring and a pair of tile nippers. These can be used to nip or nibble pieces from the tile until the desired shape is achieved.
Fixing
Starting at your middle reference point apply your tile adhesive to an area of approx 1m2 at a time using a notched trowel (6 or 8mm notch) at a 45 degree angle to the wall. Firmly press the tile into the adhesive using a slight twisting motion.
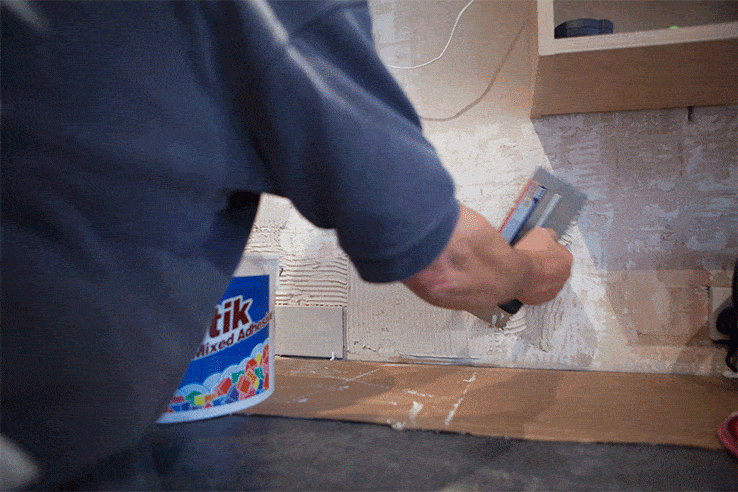
Use the required sized spacer between each tile on all sides to give consistent sized grout lines.
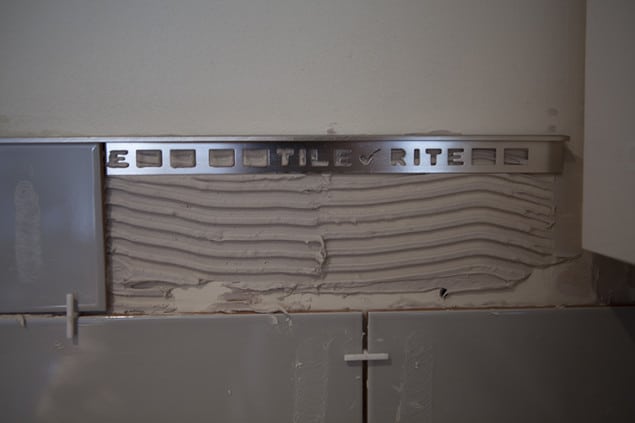
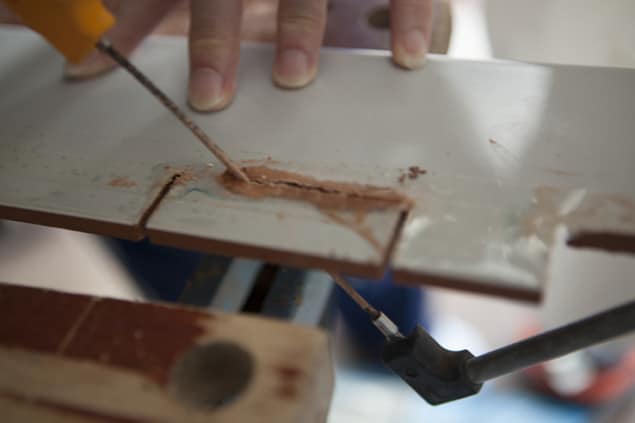
Grouting
Allow the tile adhesive 24 hours to cure before grouting. Mix the grout as per the manufacturers instructions forming an even paste. Apply using a rubber grout float or squeegee at a 45 degree angle to the wall, making sure to press the grout firmly into the gaps.
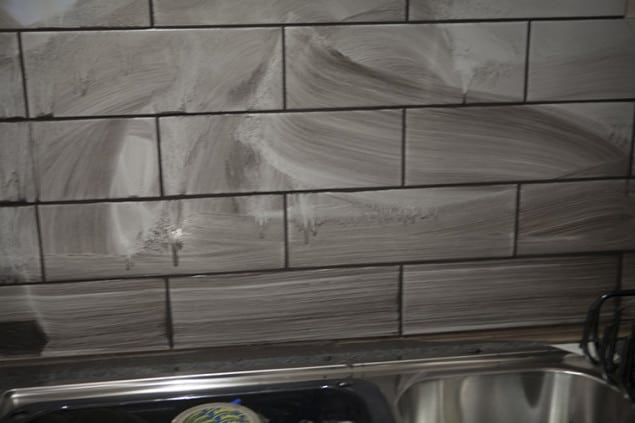
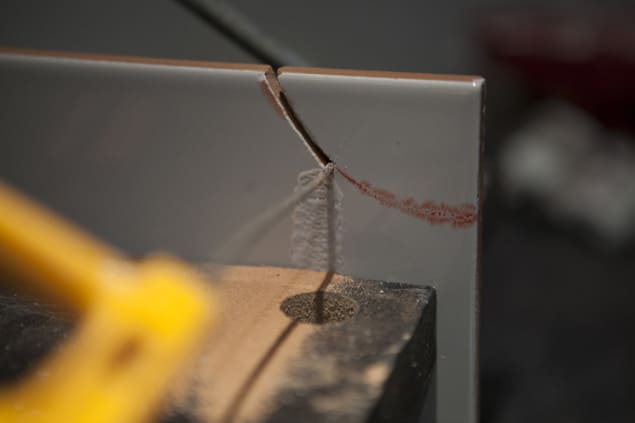
Wipe any excess grout from the face of the tile using a damp sponge being careful not to remove the grout from the grout line. After approximately 30 minutes buff the tiles with a soft dry cloth to remove any grout haze. This can be repeated until the face of the tile is clean.
Finishing
All internal corners both horizontal and vertical should have matching silicone applied to eradicate any cracking from movement, such as along worktops etc.
So that’s how you can give your kitchen a fresh new look by updating the wall tiles. It’s one of the cheaper and easier things you can change and can be done with reasonably minimal disruption, as you can still use your kitchen appliances etc whilst the work is in progress. Things just might get a little messy for a while. Hopefully, this little “tutorial” style post has provided you with some useful guidance and tips should you decide to embark on a similar project yourself.
You’ll have to wait a little while to see how Ruth’s kitchen now looks but hopefully the finishing touches will be made shortly and she can get photographing it for you! I’m certainly intrigued to see how it’s turned out, especially as I embark on my own kitchen refresh project in the coming weeks.
This post was written in collaboration with Tile Mountain who kindly supplied (free of charge) Ruth with the tiles and the associated equipment necessary to carry out the project. We would like to thank Tile Mountain for their co-operation in this project and for the expert guidance they were able to share with us. We only work with brands that we feel are a good fit for the blog and we retain all editorial control of the posts we publish.